Ariens 920402 - Sno-Tek 24E Operator's Manual Page 16
- Page / 32
- Table of contents
- BOOKMARKS
- Service Guide 1
- TABLE OF CONTENTS 2
- 920-756-4688 3
- PRACTICES & LAWS 4
- REQUIRED OPERATOR TRAINING 4
- SAFETY ALERT SYMBOL 4
- SIGNAL WORDS 4
- SAFETY DECALS 5
- SAFETY RULES 6
- Maintenance and Storage 7
- Personal Protection 8
- Slope Operation 8
- Towing/Transporting 8
- Accessories 8
- DRAINING FUEL SYSTEM 9
- SERVICE POSITION 9
- BOTTOM COVER REMOVAL 10
- SEPARATE AUGER HOUSING FROM 11
- ATTACHMENT DRIVE BELT 13
- REPLACEMENT 13
- TRACTION DRIVE BELT 14
- Install Traction Drive Belt 15
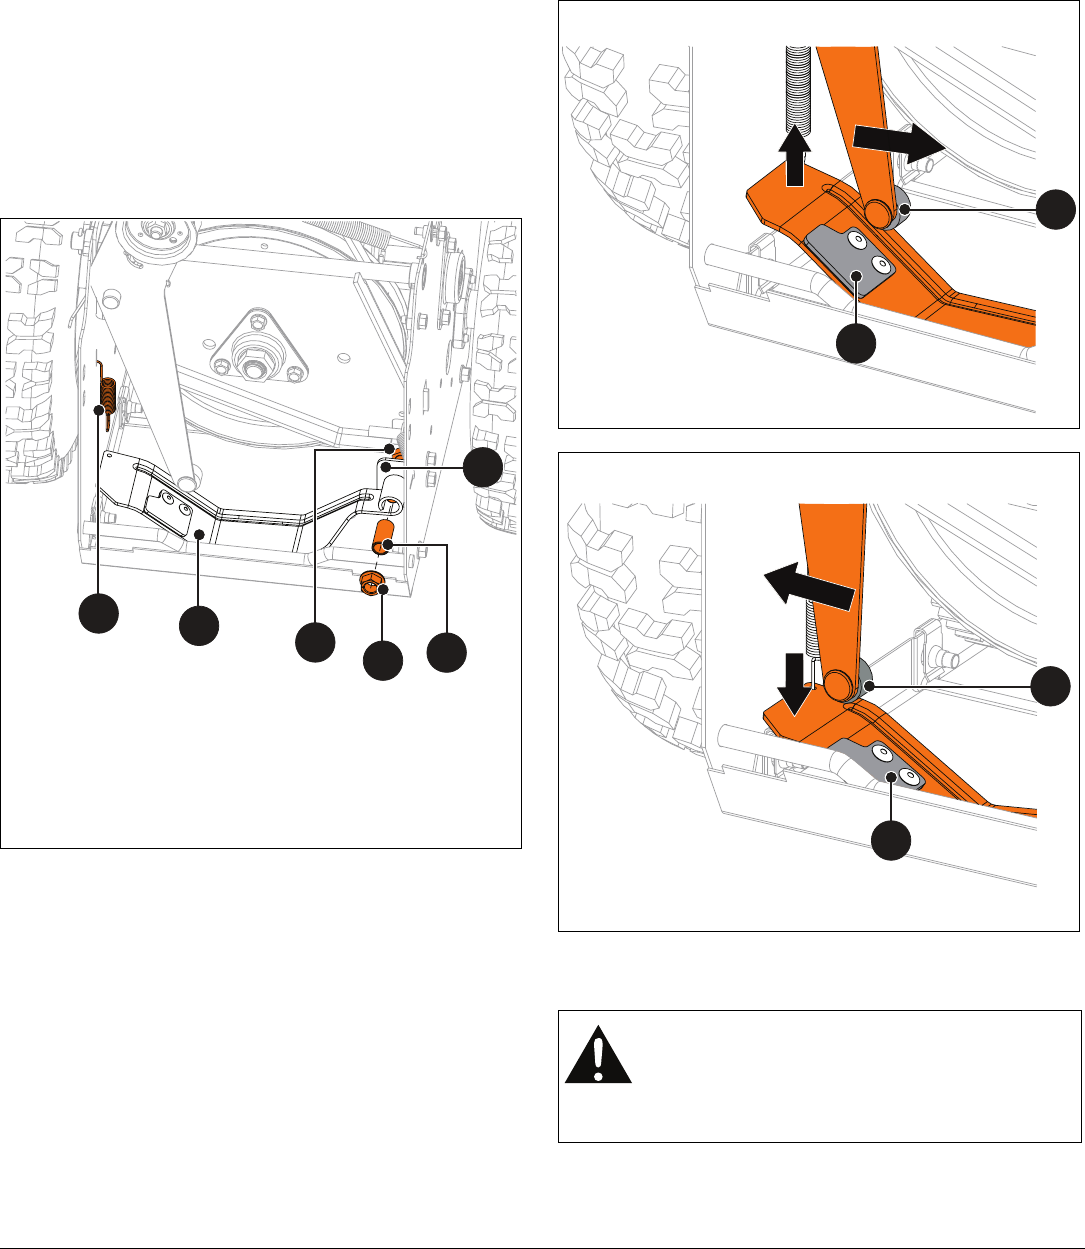
- ATTACHMENT BRAKE REPLACEMENT 16
- FRICTION DISC REPLACEMENT 17
- Install Friction Disc 18
- AUGER REPLACEMENT 19
- Install Auger 20
- AUGER GEARCASE REPLACEMENT 22
- IMPELLER REPLACEMENT 22
- ENGINE REPLACEMENT 23
- TRACTION DRIVE CABLE 24
- AXLE BUSHING REPLACEMENT 25
- CHUTE GEAR REPLACEMENT 26
- Install Pinion Gear 27
- Remove Chute Rotation Gear 27
- SCRAPER BLADE REPLACEMENT 28
- SERVICE PARTS 29
- SERVICE RECORD 30
Related products and manuals for Snow throwers Ariens 920402 - Sno-Tek 24E
 (34 pages)
 (25 pages)
 (32 pages) (5 pages)
(2 pages)
(36 pages)
(44 pages)
(32 pages) (5 pages)
(2 pages)
(36 pages)
(44 pages)
© 2020, manymanuals.com. All rights reserved. | 0.941 s |
 Manymanuals.com
 Manymanuals.de
 Manymanuals.fr
 Manymanuals.it
 Manymanuals.pl
 Manymanuals.cz
 Manymanuals.es
 Manymanuals-pt.com
Comments to this Manuals