Ariens Promaster 144Z Specifications Page 20
- Page / 32
- Table of contents
- TROUBLESHOOTING
- BOOKMARKS
- Owner/Operator Manual 1
- TABLE OF CONTENTS 4
- INTRODUCTION 4
- SAFETY ALERT SYMBOL 5
- SIGNAL WORDS 5
- NOTATIONS 5
- PRACTICES AND LAWS 5
- REQUIRED OPERATOR TRAINING 5
- 4. WARNING! 7
- 5. HOT SURFACES! 7
- 6. ROTATING PARTS 7
- 7. DANGER! 7
- SAFETY RULES 7
- ASSEMBLY 10
- CONTROLS AND FEATURES 11
- (992077, 078 11
- OPERATION 12
- MAINTENANCE SCHEDULE 15
- SERVICE AND ADJUSTMENTS 17
- MOWER BLADES 18
- LUBRICATE UNIT 19
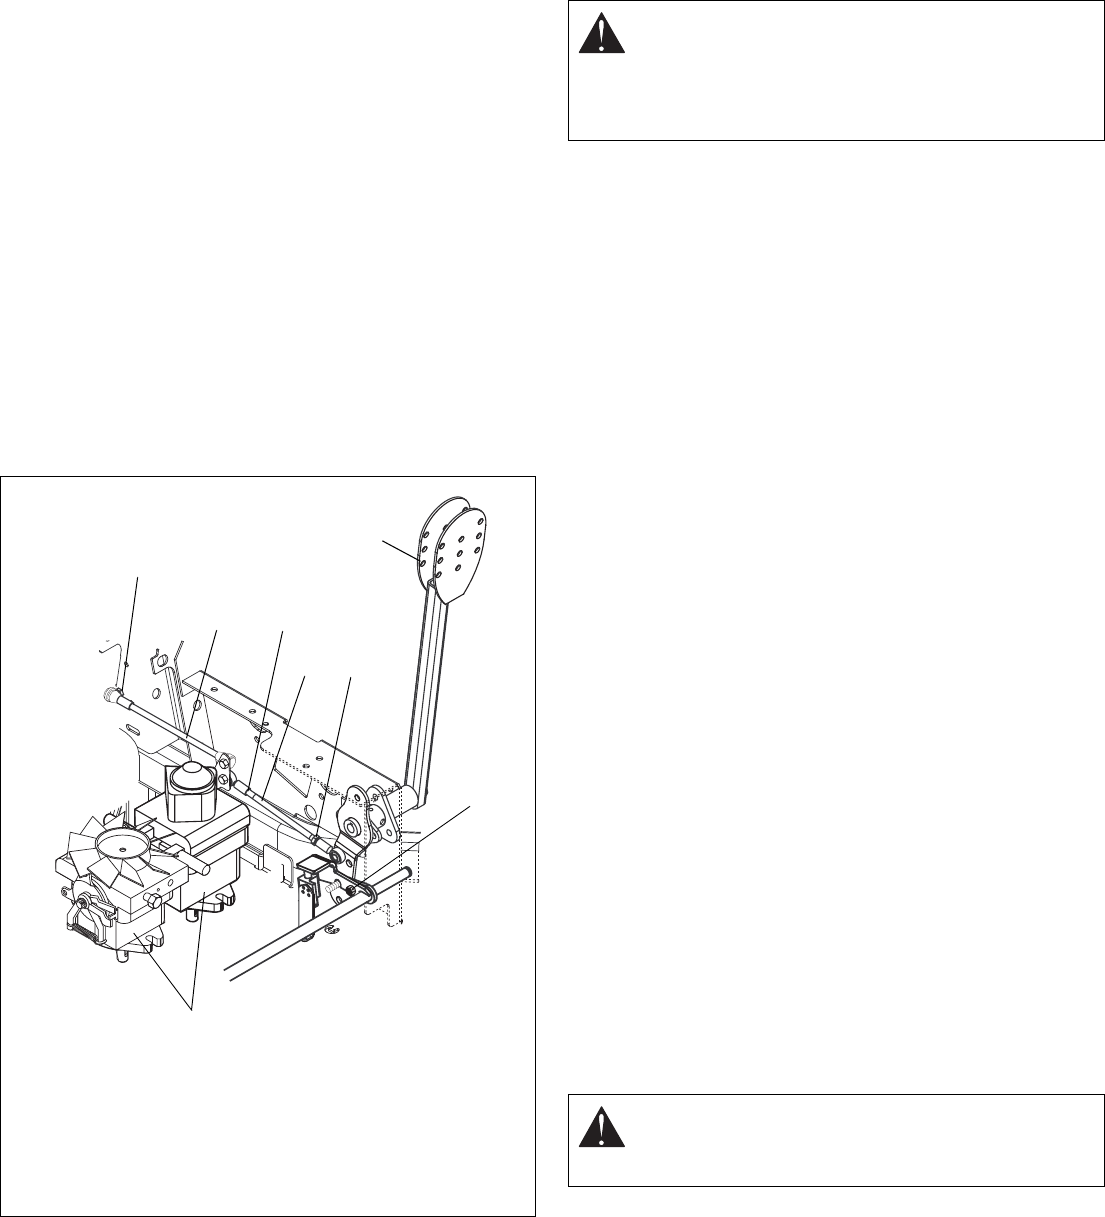
- STEERING CONTROL NEUTRAL 20
- ADJUSTMENT 20
- LEVER HANDLES 21
- PARKING BRAKE ADJUSTMENT 21
- Belt Access 22
- Replacing Mower Belts 22
- Replacing the Hydro Pump Belt 22
- MOWER DECKS 23
- MOWER LIFT PEDAL ADJUSTMENT 23
- Leveling the Mower Deck 24
- SHORT TERM 25
- LONG TERM 25
- TROUBLESHOOTING 26
- ACCESSORIES 27
- SERVICE PARTS 27
- SPECIFICATIONS 28
Related products and manuals for Lawnmowers Ariens Promaster 144Z
 (40 pages)
 (32 pages)
 (26 pages)
(28 pages)
(26 pages)
(28 pages)

 (110 pages)
(36 pages)
(110 pages)
(36 pages)
© 2020, manymanuals.com. All rights reserved. | 1.224 s |
 Manymanuals.com
 Manymanuals.de
 Manymanuals.fr
 Manymanuals.it
 Manymanuals.pl
 Manymanuals.cz
 Manymanuals.es
 Manymanuals-pt.com
Comments to this Manuals