Ariens 915167-Zoom XL 54 Specifications
Browse online or download Specifications for Lawnmowers Ariens 915167-Zoom XL 54. Ariens 915167-Zoom XL 54 Specifications User Manual
- Page / 36
- Table of contents
- TROUBLESHOOTING
- BOOKMARKS
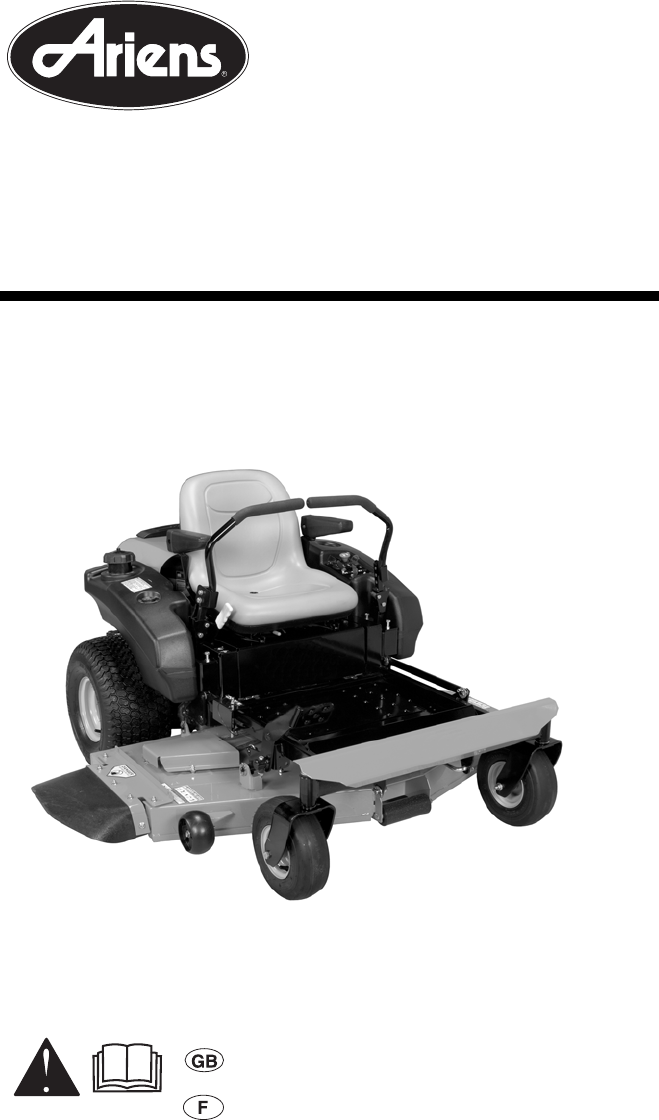
- Zoom XL® 1
- TABLE OF CONTENTS 2
- INTRODUCTION 2
- PRODUCT REGISTRATION 3
- UNAUTHORIZED REPLACEMENT 3
- DELIVERY 3
- DISCLAIMER 3
- SAFETY ALERTS 4
- NOTATIONS 4
- SAFETY DECALS AND 4
- LOCATIONS 4
- 04237000 5
- 6. Hot Surfaces! 6
- 7. Caution! 6
- 8. Danger! 6
- EMISSION CONTROL SYSTEM 7
- SAFETY RULES 7
- ASSEMBLY 10
- CONTROLS AND FEATURES 12
- OPERATION 13
- 08088400A 14
- FILLING FUEL TANK 15
- GASOLINE 15
- STOPPING IN AN EMERGENCY 15
- Stopping the Engine 16
- Starting the Engine 16
- MAINTENANCE SCHEDULE 17
- SERVICE AND ADJUSTMENTS 18
- OPENING AND CLOSING HOOD 19
- OPENING DECK ACCESS PLATE 19
- REPLACING MOWER BLADE 19
- LEVELLING AND ADJUSTING 20
- PITCH OF MOWER DECK 20
- Mower Blade Height And Pitch 21
- (Figure 17): 21
- SERVICING BATTERY 22
- ADJUSTING STEERING LEVERS 23
- REPLACING PTO BELT 24
- REPLACING HYDROSTATIC BELT 25
- (Figure 26) 26
- Purging the Hydraulic System 26
- TROUBLESHOOTING 27
- SERVICE PARTS 29
- ACCESSORIES 29
- SPECIFICATIONS 30
- WARRANTY STATEMENT 31
- Disclaimer 32
- Two-Year Limited Lawn and 33
- Garden Consumer Ride-On 33
- Warranty 33
- Exceptions and Limitations 34
Summary of Contents
Zoom XL®Owner/Operator ManualManuel Du Propriétaire/UtilisateurModels915163 – Zoom XL 42915165 – Zoom XL 48915167 – Zoom XL 54ENGLISH04043500 10/10Pr
GB - 10Tools Required• Adjustable wrench• 9/16" wrench• Petroleum jelly or dielectric grease.Unpack UnitRemove unit and all other components from
GB - 11Check Engine Oil LevelRefer to Engine Manual.Level Mower DeckSee LEVELLING AND ADJUSTING PITCH OF MOWER DECK on page 20.Fill Fuel TankFill fuel
GB - 121. Ignition Switch2. PTO Switch3. Throttle Lever4. Seat5. Steering Levers6. Parking Brake7. Fuel Tank8. Mower Lift Pedal9. Mower Deck10. Discha
GB - 13CONTROLS AND FEATURESSee figure 5 for all controls and features locations.Safety Interlock SystemPerform the following tests to ensure the safe
GB - 14Timer (TMR1): measures the time spent on individual jobs. Press and hold the toggle button to reset the timer to zero. TMR1 will then start mea
GB - 15Adjusting SeatLift adjustment lever and slide seat forward or backward to the desired position.FILLING FUEL TANKTo add fuel to the fuel tank:1.
GB - 16MOVING UNIT MANUALLYDisengage (2) transmission bypass levers to drive unit and engage (1) transmission bypass levers to push unit manually (fig
GB - 17IMPORTANT: Proper maintenance can prolong the life of unit. The following chart shows the recommended service schedule. Refer to the maintenanc
GB - 18TIPPING SEAT FORWARDPut steering levers up and tip seat forward.Each UseFollow Engine Manual Mainten-ance SchedulePerform scheduled engine main
GB - 19OPENING AND CLOSING HOODTo open, pull up on the back of the hood until hood hits the hood stop and push down on back of hood to close (figure 1
GB - 2SAFETY. . . . . . . . . . . . . . . . . . . . . . . . . . 4ASSEMBLY . . . . . . . . . . . . . . . . . . . . . . 10CONTROLS AND FEATURES . . . .
GB - 20LEVELLING AND ADJUSTING PITCH OF MOWER DECKNOTE: Adjust on a level surface, with the tires inflated to the correct air pressure (see SPECIFICAT
GB - 21Adjusting The Mower Deck To Adjust Mower Blade Height And Pitch (Figure 17):NOTE: Adjusting the mower deck will adjust the height and pitch of
GB - 22SERVICING BATTERYNOTE: Unit comes equipped with a maintenance-free battery that requires no regular maintenance except cleaning the terminals a
GB - 23Charging the Battery(Figure 19)Follow First Aid directions for contact with battery fluid.• External Contact: Flush with water.• Eyes: Flush wi
GB - 243. Adjust Steering Lever Forward or Backward1. Loosen, do not remove, the bolts securing the handlebar to the upper control arm.2. Slide steer
GB - 254. Remove PTO belt from left mower deck pulley.5. Slowly release idler arm until tension is removed from idler spring.6. Remove PTO belt from m
GB - 26Change Hydraulic Fluid and Filter(Figure 26)NOTE: Change hydraulic fluid and filter after the first 75 hours of operation and then every 400 ho
GB - 27Short Term StorageIMPORTANT: NEVER clean unit with high-pressure water or store unit outdoors.Remove all dirt, grease, leaves, etc. Store in a
GB - 28Engine runs rough. 1. Choke engaged. 1. Disengage choke. 2. Air filter cartridge plugged. 2. Clean or replace air filter cartridge. Refer to E
GB - 29Unit does not travel in a straight line. 1. Incorrect tire pressure. 1. Check tire pressure (see SPECIFICATIONS on page 30) 2. Steering levers
GB - 3• Record Unit Model and Serial numbers here.• Record Engine Model and Serial numbers here.PRODUCT REGISTRATIONThe Ariens dealer must register th
GB - 30SPECIFICATIONSModel Number 915163 915165 915167Model Zoom XL 42 Zoom XL 48 Zoom XL 54Engine Kawasaki FR651Kawasaki FR691Displacement - in.3 (c
CARB_EPA_201131 CALIFORNIA AND EPA (UNITED STATES ENVIRONMENTAL PROTECTION AGENCY) EVAPORATIVE EMISSION CONTROL WARRANTY STATEMENTYOUR WARRANTY RIGHTS
CARB_EPA_201132(4.) Repair or replacement of any warranted part under the warranty provisions of this article must be performed at no charge to the ow
Con_Ride_201133Two-Year Limited Lawn and Garden Consumer Ride-On WarrantyAriens Company (Ariens) warrants to the original purchaser that Ariens, Grave
Con_Ride_201134To find an Ariens or Gravely authorized service representative, contact Ariens at:655 W. Ryan StreetBrillion, WI 54110(920) 756 - 4688w
Ariens Company655 West Ryan StreetBrillion, WI 54110-1072920-756-4688Fax 920-756-2407www.ariens.com
GB - 4SAFETY ALERTSThe safety alert symbol is used in decals and with this manual. Understand the safety message. It contains important information ab
GB - 51. Caution!2. Danger!3. Danger!4. Warning!077541 Read the operator’s manual. Keep children and others away from unit while operating.
GB - 65. Danger! To Avoid Serious Injury or Death6. Hot Surfaces!7. Caution!8. Danger!Read the operator’s manual.Keep children and others away from un
GB - 7EMISSION CONTROL SYSTEMThis equipment and/or its engine may include exhaust and evaporative emissions control system components required to meet
GB - 8DO NOT operate unit if safety interlock system is damaged or disabled. Check safety interlock before each use.ALWAYS remove key to prevent unaut
GB - 9Replace fuel cap securely and clean up spilled fuel.NEVER fill containers inside a vehicle or on a truck or trailer bed with a plastic liner. Al
More documents for Lawnmowers Ariens 915167-Zoom XL 54

Related products and manuals for Lawnmowers Ariens 915167-Zoom XL 54
 (26 pages)
 (44 pages)
 (32 pages) (17 pages)
(7 pages)
(32 pages) (17 pages)
(7 pages)
© 2020, manymanuals.com. All rights reserved. | 0.331 s |
 Manymanuals.com
 Manymanuals.de
 Manymanuals.fr
 Manymanuals.it
 Manymanuals.pl
 Manymanuals.cz
 Manymanuals.es
 Manymanuals-pt.com
Comments to this Manuals