Ariens 90102800 Owner's Manual Page 4
- Page / 68
- Table of contents
- TROUBLESHOOTING
- BOOKMARKS
- REAR TINE TILLER 1
- SAFETY RULES 2
- TABLE OF CONTENTS 3
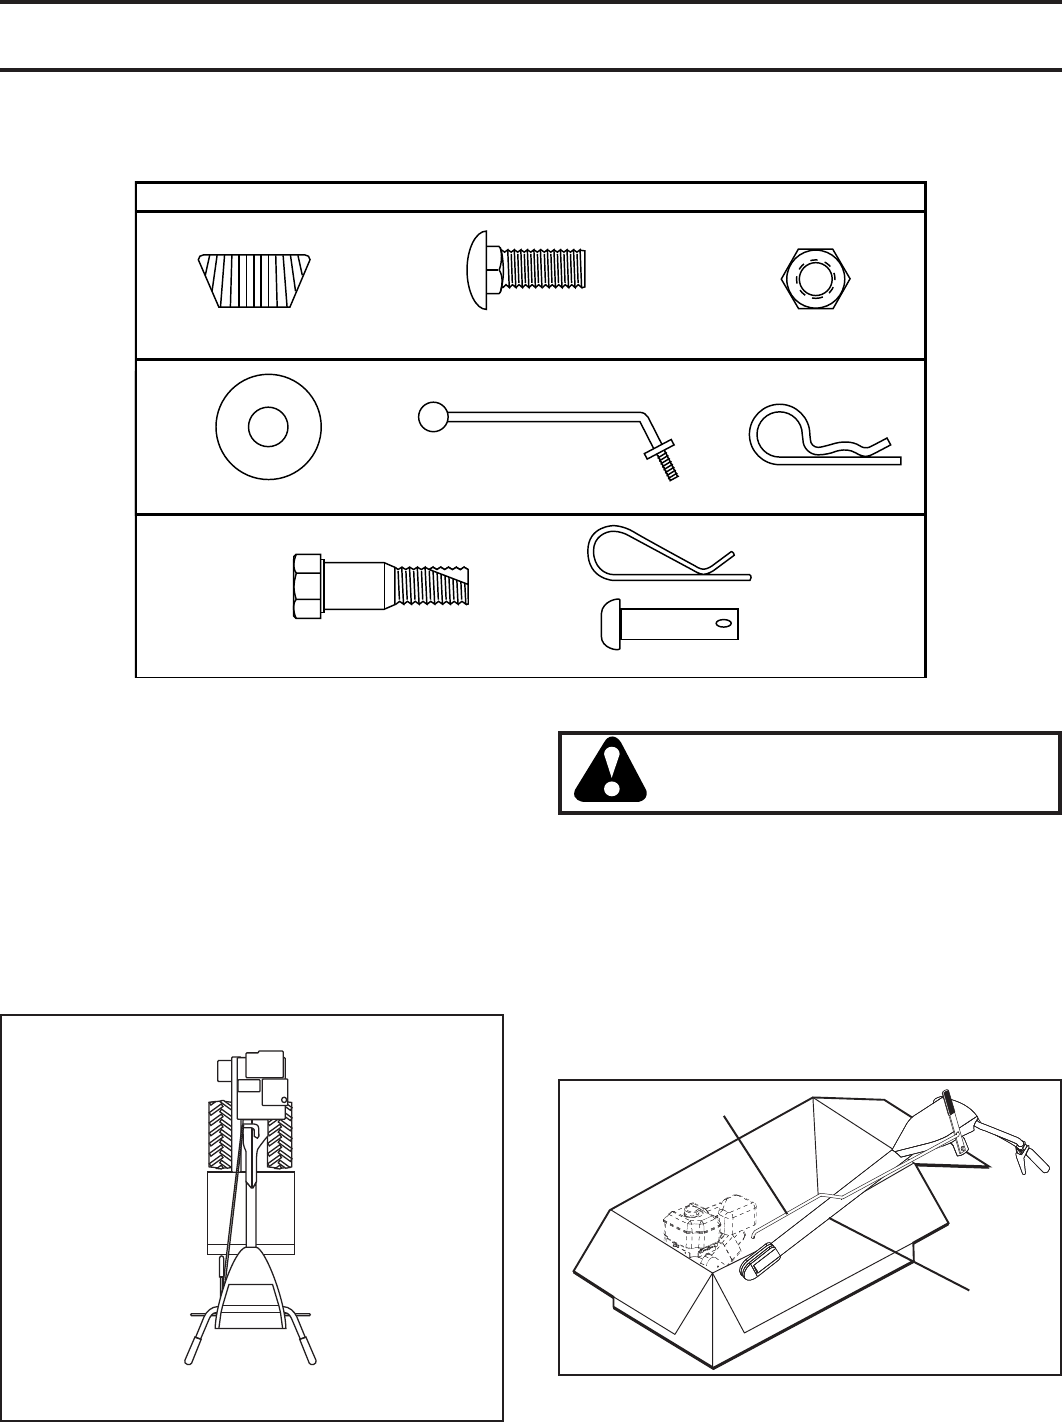
- ASSEMBLY 4
- OPERATION 10
- MAINTENANCE 11
- SERVICE AND ADJUSTMENTS 14
- TROUBLESHOOTING POINTS 17
- HANDLE ASSEMBLY 18
- MAINFRAME, LEFT SIDE 20
- MAINFRAME, RIGHT SIDE 22
- TRANSMISSION 24
- TINE SHIELD 26
- TINE ASSEMBLY 28
- ITEM MFG. ARIENS 31
- 1 inch = 25.4 mm 31
- Two-Year Limited Lawn 32
- Exceptions and Limitations 33
- Disclaimer 33
- PARTS AND SERVICE 34
- L’ENTRETIEN ET 35
- LES PIÈCES DE RE CHANGE 35
- Exceptions et limitations 36
- Déni de responsabilité 36
- Con_L&G_2010 37
- DÉCALCOMANIE 38
- ENSEMBLE DU DENTS 40
- DÉFLECTEUR DES DENTS 42
- ENSEMBLE DU CADRE C.D 46
- ENSEMBLE DU CADRE C.G 48
- ENSEMBLE DE LA POIGNÉE 50
- GUIDE DE DÉPANNAGE 52
- RÉVISION ET RÉGLAGES 53
- ENTREPOSAGE 53
- ENTRETIEN 56
- UTILISATION 59
- CONTENU DU SAC DES PIÈCES 65
- SOMMAIRE 66
- RÈGLES DE SÉCURITÉ 67
- MOTOBINEUSE À FRAISE ARRIÈRE 68
© 2020, manymanuals.com. All rights reserved. | 0.473 s |
 Manymanuals.com
 Manymanuals.de
 Manymanuals.fr
 Manymanuals.it
 Manymanuals.pl
 Manymanuals.cz
 Manymanuals.es
 Manymanuals-pt.com
Comments to this Manuals